There's an infinite number of ways to make an alcohol stove, but I like this one because it doesn't need to be primed, it can't explode like pressurized stoves, the burning fuel can't spill if tipped over, and it weighs just 15 grams, not including a wind screen. In ideal conditions, it will boil 2 cups of water with just over 1/2 ounce of fuel in about 7 minutes. Here's how I made it.

For the alcohol stove, you will need:
- Two aluminum cans. You could use 12 ounce soda cans, but I prefer a smaller stove, so I used 7.5 ounce cans.
- A piece of aluminum screen the size of the diameter of the can.
- A piece of formaldehyde-free fiberglass insulation.
- Something to cut the aluminum. A Dremel tool works great for the next step and a decent pair of scissors will easy cut the thin sides of the can.

S T E P 1
Cut a hole into the bottom of one of the cans as shown. If you'd like, sand down the edges to remove any rough spots.
S T E P 2
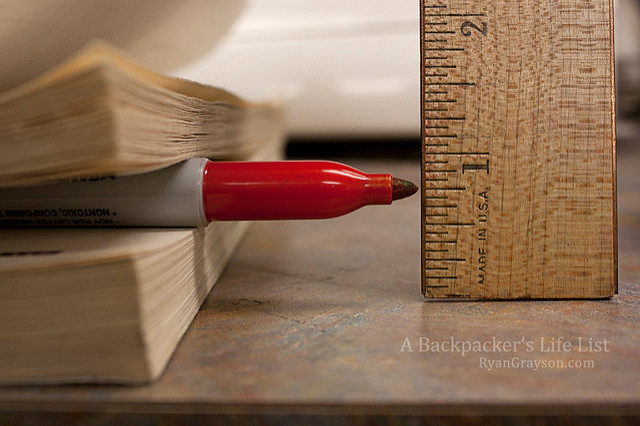
Next, you will be cutting the bottoms off of the two cans. To make this easier, use a book and marker as shown on the left, to draw a line. Using a ruler, prepare to draw the line about 3/4" from the bottom of the can.

S T E P 3
Now, spin the cans around the marker to make a line that you will cut along.

S T E P 4
Now cut the bottom off both cans.

S T E P 5
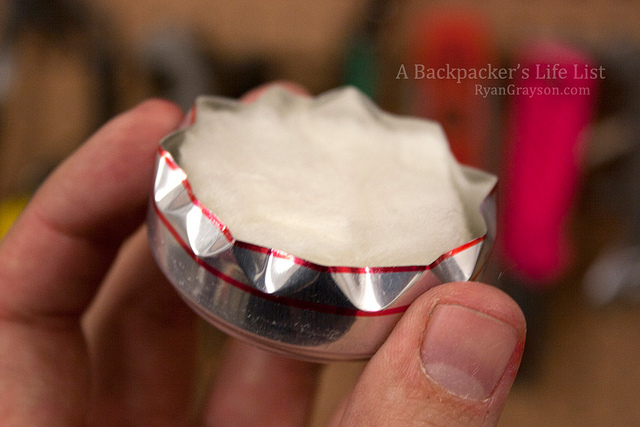
Eventually you're going to fit the two pieces into one another. To make this easier, take the can with the hole that you cut earlier, and bend in the edges as shown on the left. For better accuracy, I drew another line about 1/2" from the bottom.
Now bend in the edges all the way around the can at this second line as shown. Needle-nose pliers make it easier.

S T E P 6
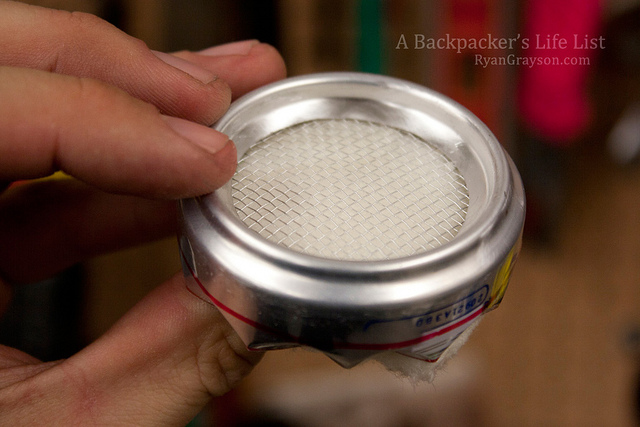
Now cut a round piece of aluminium screen to fit over the hole.
S T E P 7
Stuff this full of fiberglass insulation. The insulation will absorb and wick the alcohol, so it burns evenly. It will also prevent the alcohol from spilling out and setting things on fire after it's lit.
Once on the AT, a friend's alcohol stove tipped over and the flames melted my plastic fork and engulfed my hand. I was able to put it out before any injury, but it made me really appreciate the insulation in my stove.
Of course, you can find a bit of free insulation inside just about any wall or ceiling, but be sure it's formaldehyde-free insulation to prevent potentially harmful fumes.
S T E P 8
Here is the finished top half. I should be a hand model, just look at that.

S T E P 9
Now is a good time to sand off any rough edges on the hole-free bottom half.

S T E P 1 0
In order to fit the two pieces together more easily, put the top half, with the hole, in the freezer for about 10 minutes. This will shrink the aluminum very slightly.
If you're making this from the trail or on the road, you can skip this step or you could use a cold creek or snow. Or maybe stick it in an ice box outside a gas station while you shop.

Warming the top half of the can for about 5 minutes will cause the aluminum to slightly expand. I used a toaster oven set to 150° F. And if you're on the trail, you could set it near a campfire.

S T E P 1 1
Now fit the two pieces together. To get a nice tight seal, I used a board and hammer as shown. Once it goes back to room temperature it should be very difficult to pull apart.
S T E P 1 2
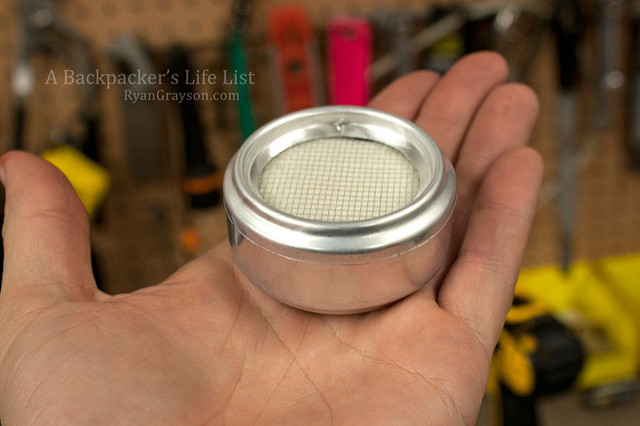
I sanded off the rest of the Pepsi paint and I have my finished product. The stove itself weighs only 8 grams!
S T E P 1 3
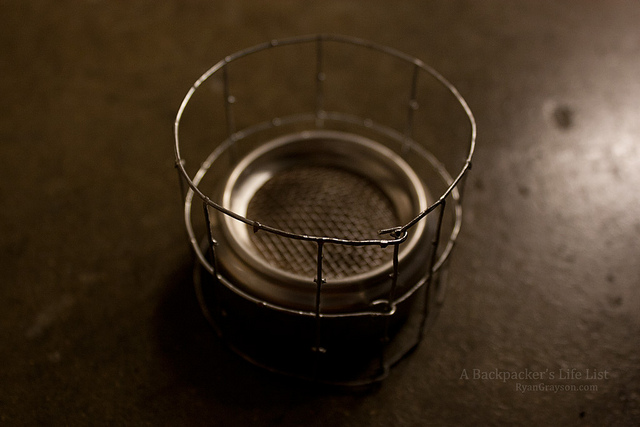
But there are a couple more things. You will need a pot stand and some kind of wind screen. They can be made in a number of ways. As shown on the left, a pot stand can be as simple as a piece of hardware cloth formed into a cylinder. This one weighs 7 grams.

S T E P 1 4
A simple wind screen can be made out of thick aluminum foil, such as the kind used in cheap cookie sheet liners. This one weighs about 10 g.
You could also use aluminum roof flashing or if nothing else build a barrier out of whatever else you have around like rocks or wood. Or dig a hole, whatever you have to do to keep the wind off your flame.

S T E P 1 5
This is an optional step, a lid. If you're pot doesn't come with a lid, you can make one very easily out of aluminum. My craftsmanship is rather poor on this, but I used a piece of aluminum flashing.
I left 3 tabs along the outside that are bent around the lip of the pot so it snaps into place. It does get hot, but a quick flick of one of the tabs pops it right off. I also punched in a few holes to strain pasta and to allow steam to escape. This adds 5 grams, but lids save fuel, so in a way they decrease your weight.

Everything was made to fit inside the pot, so it stores easily and everything is protected.

S T E P 1 6
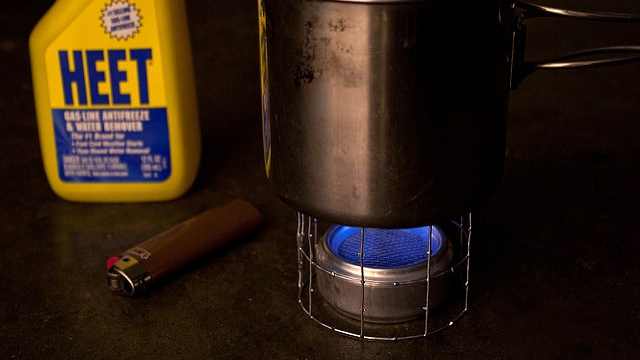
Just pour in about 1/2 to 1 ounce of denatured alcohol or HEET and light. More on fuel below.
As you can see, the stove burns nice and even. The fiberglass insulation lasts for months and possibly years with normal usage. In other words, much longer than it will take for me to lose it again. Be sure to let all the fuel burn off before stowing it away.
Fuel
I keep denatured alcohol in an empty soda bottle that is clearly marked, so nobody accidentally drinks it. The quantity needed to boil water depends on temperature, wind, and elevation, but to make it simple, I take about 1 ounce of fuel per meal and usually have more than enough. Denatured alcohol can be purchased in most stores that sell hardware. Many outfitters sell it by the ounce.
If you can't find denatured alcohol in a small resupply town, you can get the yellow bottle of HEET gas line anti-freeze in most gas stations. They come in a 12 ounce bottle, which is a good amount to get you to the next resupply town without carrying too much or wasting any. HEET is usually a little bit cheaper than denatured alcohol, but it doesn't burn as hot, so remember that you'll need a little bit more to boil water.
If buying HEET, make sure to get the yellow bottle, the IsoHEET product in the red bottle can form peroxides, which may explode. And some experts are now saying that an explosion in your face can really put a damper on your backcountry experience.